I am so excited to be a part of this
ImpressArt® Metal Stamps Designer Craft Blog Connection hop! I received my product from ImpressArt®, opened the box and became almost immediately obsessed. I have been adding metal stamped accents to almost every creative project I've made since receiving my product. Today I'm sharing three jewelry projects featuring the lowercase Newsprint set of metal stamps, and assorted stamping blanks. There are 3 projects, and I've included instructions and supplies for each - so I appreciate your patience with this long post :0). Also, ImpressArt is hosting a great opportunity for you to win a fantastic prize package - The Grand Prize is valued at up to $120.00 and contains:
1- ImpressArt alphabet set of the winner's choice
1- ImpressArt Steel Stamping Block, small
1- ImpressArt Metal Stamping Hammer
1- ImpressArt Stamp Straight Tape
An Assortment of metal discs
To enter the contest, you must go to the following link and follow the directions:
https://www.facebook.com/pages/ImpressArt/155664424487844?sk=app_194975693850063
I can promise you'll be seeing a lot more of my projects with metal stamping. In the meantime, be sure to follow the Designer Craft Blog Connection link at the right to see what other creative projects have been shared by fellow designers!
 Cobalt and Copper Pendant
Featuring Metal Stamps and Copper Offset Oval Washer Blank from ImpressArt®
Materials:
ImpressArt® Design Stamp,
Whimsy Heart Metal Stamp - Item #SC158-K-3MM
ImpressArt® Metal Stamping Blank,
Offset Oval Washer w/Ring, 2” - Copper - Item #IAD12261
ImpressArt®
Brass Metal Stamping Hammer - Item #SC711
ImpressArt®
Stamp Straight Tape™ - Item #BC21-1520
ImpressArt® Steel metal stamping block
Cobalt glass beads, brown glass beads
ART Glitter - Cobalt Vintage Glass Glitter
Copper jewelry wire
Lumiere 3D Dimensional Metallic Paint and Adhesive from Jacquard Products - #219 Blue
Jewelry pliers, wire cutters, copper colored fiber, copper necklace closure finding, soft cloth
 Instructions:
Cut two small pieces of Stamp Straight Tape™ and align on bottom of Copper Offset Oval Washer. Holding upside down, stamp Whimsy Heart Metal Stamp radiating out from center opening in space repeatedly between tape. From there, move each piece of tape in a radiating fashion and repeat stamping heart “upside down”.


Use fingertip to apply small amount of blue Lumiere 3D Dimensional Metallic Paint & Adhesive over metal stamped hearts. While paint is still wet, gently rub surface of copper with soft cloth, allowing blue paint to enhance stamped hearts.
Use round end of hammer to gently distress outside edge of metal and around inner opening.

Apply thin lines of blue Lumiere 3D Dimensional Metallic Paint & Adhesive between each row of stamped hearts. While wet, add cobalt blue vintage glass glitter. Let dry.
Measure and cut copper colored fiber to desired pendant length. Loop through ring on top of oval to hold in place. String large blue glass bead onto fibers and directly to ring, tie large knot in fiber over glass bead. Add copper necklace closure. Add 3 smaller descending sizes of cobalt and brown glass beads to a piece of copper wire. Arrange in opening and wrap around ring to hold in place.
© All images - Cindi Bisson -
Behind These Eyes™
And on to Project #2 -
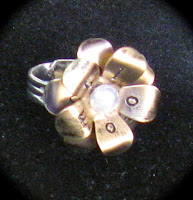 BLOOM Ring
Featuring Metal Stamps and Floral Stamping Blanks from ImpressArt®
Materials:
BLOOM Ring
Featuring Metal Stamps and Floral Stamping Blanks from ImpressArt®
Materials:
ImpressArt® Alphabet Stamp Set,
Newsprint Lowercase Stamp Set - Item #SC1316-3MM
ImpressArt® Metal Stamping Blank,
5 Petal Flower with Ring Stamping Blank - Brass: IAD12130 - TWO
ImpressArt®
Brass Metal Stamping Hammer - Item #SC711
ImpressArt® Steel metal stamping block
Black Sharpie Marker
We R Memory Keepers Cropo-A-Dile Punch
Pearl Dew Drop embellishment from
The Robin’s Nest
Jewelry pliers, wire cutters, soft cloth, E-6000 adhesive
Instructions:

Use lowercase Newsprint metal stamps to stamp two brass flower blanks - one letter on each petal, spelling out “BLOOM”.

Use wire tool to cut hanging ring from each charm.
Color stamped lettering with black Sharpie marker. Gently rub
from surface of brass with soft cloth, allowing black to enhance
stamped lettering

Use jewelry pliers to gently bend petals upward and outward on one flower.

Gently bend petals of second flower backward.
Trace ring back onto scrap paper. Cut circle of paper to cover ring back, adhere. This ensures the silver toned metal from ring back doesn't show around brass flower.

Use E-6000 Adhesive to mount flower with petals bent backward onto ring base, then mount flower with upward bent petals so that all petals show.
Add pearl Dew Drop accent for center of flower.
© All images - Cindi Bisson -
Behind These Eyes™
And lastly, at least for today - Project #3 -
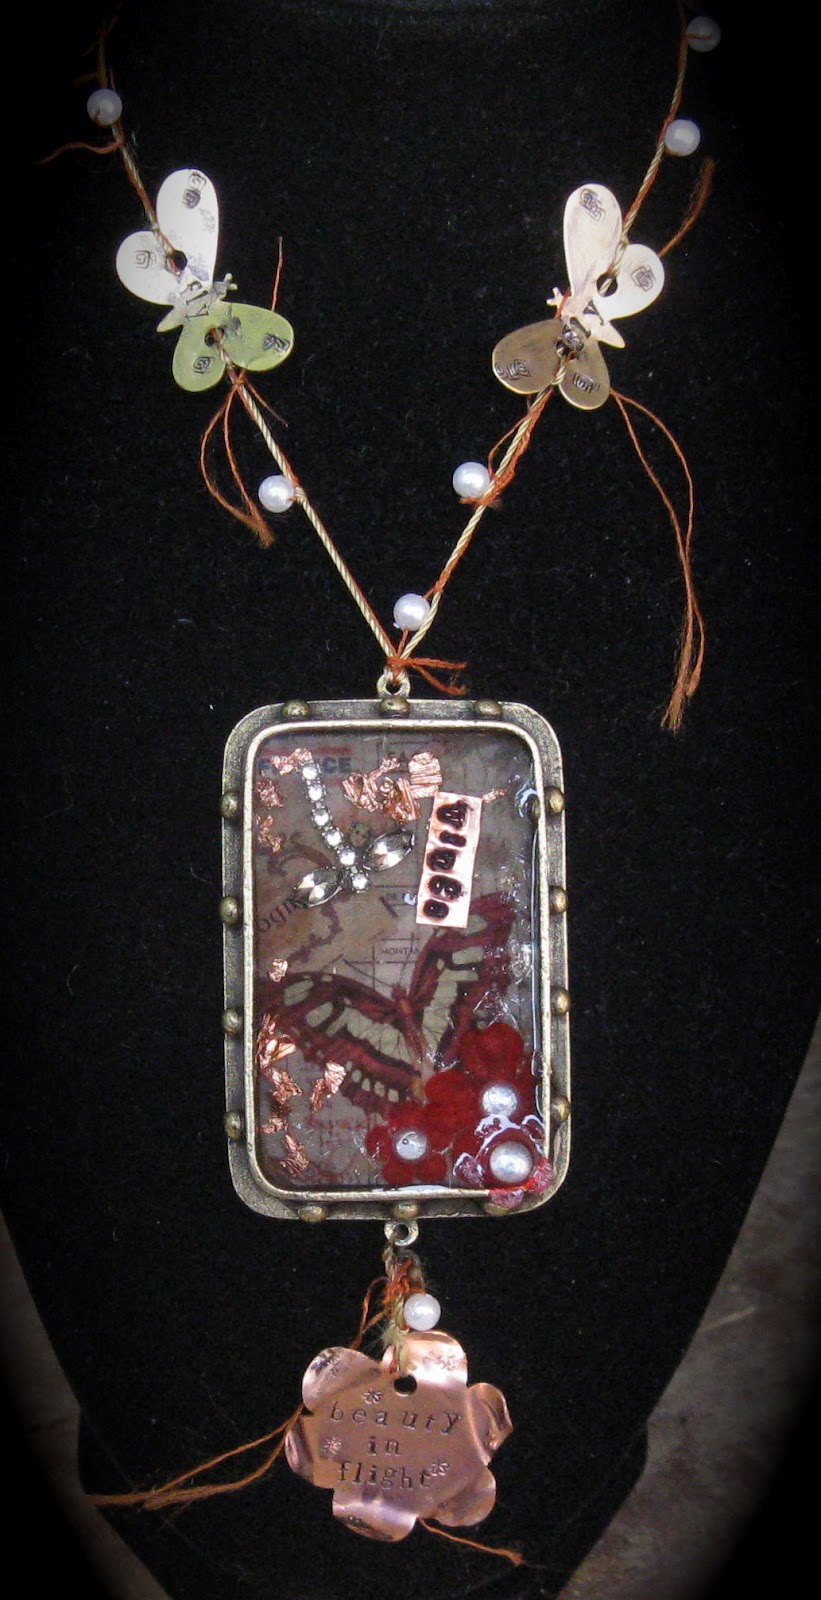
Take Flight Mixed-Media Pendant
Featuring Metal Stamps & Copper and Brass Stamping Blanks from ImpressArt® 
Materials:
ImpressArt® Alphabet Stamp Set,
Newsprint Lowercase Stamp Set - Item #SC1316-3MM
ImpressArt® Design Stamp,
Square Swirl Stamp - Item #SC1510-P-3MM
ImpressArt® Design Stamp,
Whimsy Flower Stamp - Item #SC1514-K-3MM
ImpressArt® Metal Stamping Blank,
Butterfly, 1 5/16” Brass - Item #IAD12142 - TWO
ImpressArt® Metal Stamping Blank,
6 Petal Flower, 1” Copper - Item #IAD12222
ImpressArt®
Brass Metal Stamping Hammer - Item #SC711
ImpressArt® Steel metal stamping block
We R Memory Keepers Crop-A-Dile Punch
Black Sharpie Marker
Rectangular Brass Hobknob bezel from
ICE Resin
ICE Resin
Pattered paper from Belles Dames Francaise flip book from ICE Resin
Pearl Dew Drops embellishments from
The Robin’s Nest
Jewelry pliers, wire cutters, copper colored fibers, gold/brass toned floss/fibers, small pearl beads, repurposed rhinestones, mica flakes, copper flakes, small paper flowers, copper necklace closure finding, soft cloth
Instructions:

Punch small hole near top of copper flower using Crop-A-Dile punch.
Use lowercase Newsprint letter stamps to stamp “beauty in flight”, somewhat centered, onto copper flower. Randomly stamp flower with Whimsy Flower stamp.
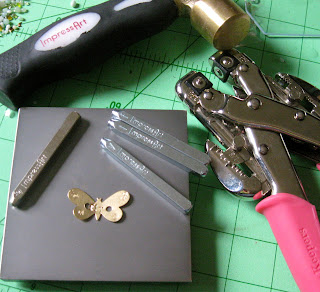
Punch two small holes approximately 1/4” apart, centered on each brass butterfly using Crop-A-Dile punch.
Use lowercase Newsprint letter stamps to stamp “fly”, between punched holes.
On each butterfly top wing tip, stamp Square Swirl stamp three times in a row, radiating upward, allowing to overlap slightly. Stamp each bottom wing once in lower corner.
Use black Sharpie to color each stamped blank, wipe with soft cloth to remove from face of blank, allowing black to enhance stamped areas.
Use jewelry pliers to gently bend the wings of each butterfly upward. Also bend the petals of the copper flower randomly upward and downward to add depth.

Line rectangular bezel with patterned paper. Sprinkle in copper flakes on left edge and mica flakes on right lower edge. Arrange repurposed rhinestones into dragonfly shape above butterfly image on patterned paper. Set two small paper flowers in lower right corner, with pearl Dew Drop centers.
On copper strip of metal, use lowercase Newsprint stamps to stamp “wings”. Trim around word, color with black Sharpie and rub with soft cloth to remove ink from surface of copper strip. Place into collaged bezel as shown.
Mix ICE Resin according to manufacturer instructions, pour into bezel. While wet, add 3rd small paper flower, coated with resin, with Dew Drop center onto lower right outside corner of bezel, extending beyond the center. Cure overnight.
Measure and cut fibers to desired length. String copper fiber with pearl bead accents approximately 1” apart, knotting to hold in place. Add stamped butterfly accents to hanging fibers. Add jewelry closure. Measure and
cut fibers to hold copper flower beneath collaged pendant. Add pearl bead, tie to stamped flower and tie to ring on filled bezel.
© All images - Cindi Bisson -
Behind These Eyes™

 This week the Designer Craft Connection's blog hop theme is "Love This!" We were asked to share projects featuring something we love - a product, tool, technique, etc. I'm sharing a project featuring several products I love, and a few techniques too!
  Instructions: