

Creative designs with a focus on unique combinations of mixed-media - You'll find them "Behind These Eyes..."
Showing posts with label ornament. Show all posts
Showing posts with label ornament. Show all posts
Sunday, December 7, 2014
Stained Glass Mosaic Smoothfoam™ Ornaments
Monday, December 9, 2013
Burlap & Wooden Snowflake Ornament

Rustic Burlap Snowflake Ornaments
Add these rustic burlap ornaments to your country Christmas tree for a homespun holiday feel.
Materials:
Smoothfoam™ ball
Blumenthal Lansing Favorite Findings™ - Wooden Snowflakes
Burlap
1” brown grossgrain ribbon
Jute ric-rac trim
Twine
Hot glue gun & hot glue sticks
Scissors
Instructions:
Cut burlap square approximately 8” x 8”.
Place Smoothfoam™ ball in center of square with hole on top. Add hot glue around hole, fold four corners of burlap upward and mount to ball. Fold remaining burlap over and glue to side of ball.
Cut piece of twine for hanging ornament, hot glue ends into hole in top of ball.
Gather edges of burlap, tie together tightly around twine loop with additional piece of twine.
Mount brown ribbon around center of ball.
Mount jute ric-rac centered on brown ribbon.
Mount wooden Blumenthal Lansing snowflake in center over ric-rac.
Sunday, December 8, 2013
Flannel Yo-Yo Heart Ornament
Here's another quick holiday tree decoration I created for Cindi's Simple Solutions at
 When Creativity Knocks! Clover's heart yo-yo maker, and Blumenthal Lansing buttons made it easy! Find the instructions here.

Friday, November 8, 2013
ICE Resin® Rue Romantique® Christmas Blog Hop - Floating Poinsettia Ornament

Floating Poinsettia Ornament
Materials:
Rue Romantique bezel - open backed
Susan Lenart Kazmer ”Carnivale” German Glass Glitter
Spellbinders® Layered Poinsettia die
Spellbinders® Grand Calibur® machine
Connie Crystal red crystal and antiqued silver metallic beads
Red cardstock
Beacon Adhesives Zip-Dry™ Adhesive
Thin jewelry wire
Jewelry pliers
Instructions:
Use Grand Calibur® and Layered Poinsettia die to cut and emboss 3 of the smallest poinsettia flowers from red cardstock.
Mix ICE Resin® according to instructions, coat back of each flower with resin and let cure. Coat front of each flower with resin, adding gold German Glass Glitter to centers of two flowers, using a small amount of ICE Resin® over the glitter to seal it in place. Let cure. Add second layer of resin to front and back of each flower and let cure.

Add red crystal bead right next to loop in bezel, then continue adding small metallic beads to end of wire, looping around and attaching to create hanging loop at end.
Mount one flower front with glitter center to flower without glitter center so petals are alternating. Mount to hanging piece of wire in open area of bezel, then mount second flower with glitter center to back of first two, covering wire. This allows the poinsettia to “float” in the center of the bezel opening.
Here are the links to the other amazing artists participating in this hop -
Friday, Nov. 8
Kristen Robinson http://kristenrobinson.typepad.com/kristenrobinson/2013/11/rue-romantique-christmas-blog-hop.html
Cindy Cima Edwards http://www.cindycima.com/2013/11/08/rue-romantique-christmas-blog-hop-the-merry-duck/
Cindi Bissonhttp://fatcatcreations.blogspot.com/2013/11/ice-resin-rue-romantique-christmas-blog.html
Saturday, Nov. 9
ICE Resin site http://wp.me/p1MCno-2W3
Pamela Huntington http://pamelahuntington.typepad.com/february_2007/2013/11/handmade-holiday-blog-hop.html
Jen Cushman http://wp.me/p1lhEq-Gb
Sunday, Nov. 10
Lesley Venable
http://flatwoodsfolkart.typepad.com/lesley_venable/2013/11/a-very-rue-romantique-christmas.html.html
Friday, December 21, 2012
PEACE with Rit Dye


Friday, December 7, 2012
Holiday Ornament Gift Box

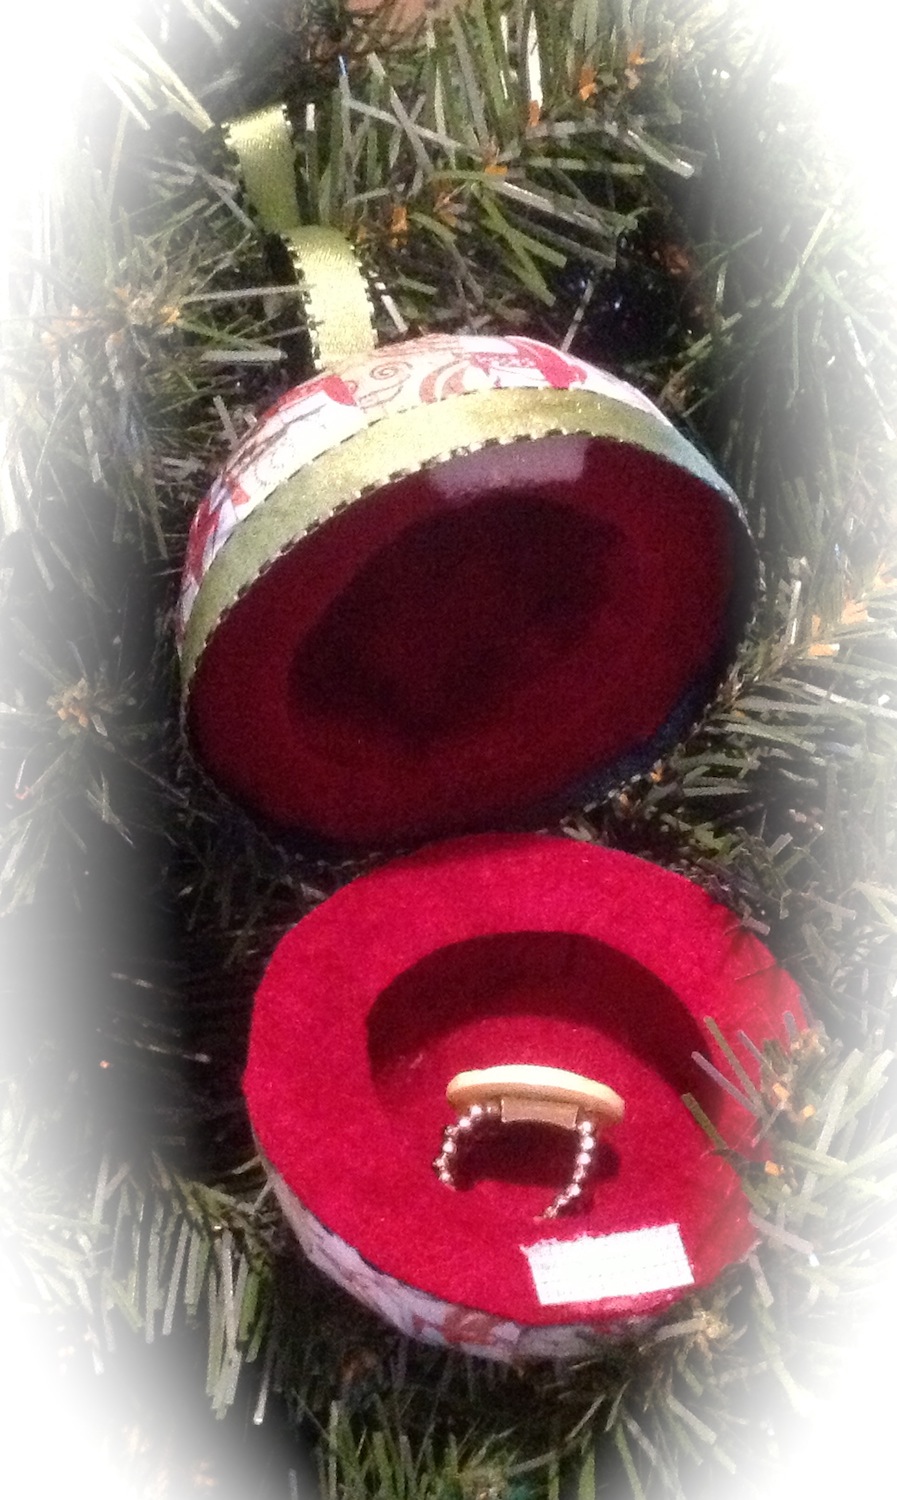
A 3” Smoothfoam ball is the base of this ornament which also serves as a gift box for a small treasure.
Smoothfoam 3” ball
Plaid Mod Podge
Connie Crystals - blue, red
Silver wire
Foam brush
1/4” Ribbon
Spoon
Reindeer paper from BasicGrey Blitzen Collection
Westcott Premium TrimAir Titanium Paper Trimmer
Westcott Craft Titanium Bonded Non-Stick Scissors
Westcott Craft Hobby Knife
Red felt
Velcro Brand Sticky Back Fasteners
Instructions:

Carefully cut ball in half with craft knife.

Use a spoon (grapefruit spoon makes it easier as it has a grooved edge) to hollow out inside of both halves of ball.
Cut 1/2” x 2” strips of patterned paper and Mod Podge onto top and bottom outsides of ball, overlapping each piece slightly. Let dry.

Cut 1 1/2” strip of wire, add small blue crystal bead and medium red crystal bead and insert through bottom center of ball.

Cut 4” strip of wire, add medium red crystal bead, medium green crystal bead, and small blue crystal bead. Insert through top center of ornament. Create loop at end to attach ribbon.
Cut felt to fit in bottom of both halves, mount. Cut strips of felt to fit around inside of balls, mount against base piece of felt in each half.
Cut ribbon to wrap around center of ornament. Glue ribbon in place on bottom of TOP of ornament,
extending downward so it will cover the edge of the bottom half when the ornament is “closed."

Mount 1" strip of ribbon vertically along back center of ball (this will be your “hinge").

Mount small piece of sticky backed Velcro to inside center front of box to hold ornament closed.
Creating hand-made ornaments each year is part of our family tradition - why not start your own tradition, and collection, this year? - Cindi
Subscribe to:
Posts (Atom)